How To Activate GPS Tracker
SpaceHawk GPS Tracker Activation
Congrats on getting your new SpaceHawk GPS tracker! You’re just a few steps away from making sure your stuff stays safe and getting that peace of mind you’ve been looking for. Setting it up is super easy, and in no time, you’ll have everything up and running. Whether you’re tracking valuable equipment or keeping an eye on the people you care about, you’re making a smart move. Let’s jump right into it—follow the steps below, and you’ll be tracking in real time before you know it!

Step 1: Setting Up Your Account and Device Activation
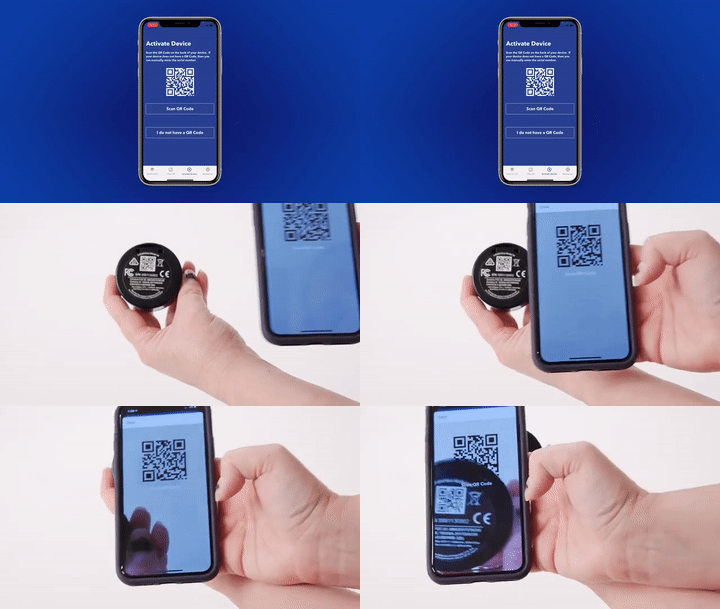
Welcome to SpaceHawk GPS Systems! Start by opening the iTrack247 app and selecting “New User Registration.” Enter a unique username, a secure password, your email address, full name, contact number, and a 4-digit PIN for additional security. After filling out these details, click “Submit.” Now, proceed to “Activate Device.” You can either scan the QR code on your device or, if it’s not available, select “I Do Not Have a QR Code” and manually input the serial number.

Step 2: Choosing Your Data Plan
Next, pick a payment plan that works best for you—whether it’s a monthly auto-charge or a prepaid option with up to 50% off. After that, set your tracking intervals. Enter your credit card details, make sure everything’s correct, and hit “Save.”
Step 3: Finalizing Activation and Getting Started
Finally, review the terms and conditions. Once everything looks good, check the box to accept and click “Submit” to activate your tracker. Your SpaceHawk GPS is now live and ready to support your business operations. If you need assistance, our website and support team are here to help every step of the way.
